MathType 7 UI basic usage
The basics
MathType is simple to install and use with no instructions. Even so, if you're new to MathType we have some tips that will help you get started.
Invest an hour in .the tutorials That's the best advice we can give. It shouldn't take longer than an hour, but it will save you hours in the future as you use MathType
Just start using it. Here are the basics:
You can open MathType from the Windows Start Menu or the Mac Applications folder. It will be even easier if you add it to the Windows Taskbar or the Mac Dock.
If you're using Microsoft Word, look for the MathType tab on Word's ribbon or if you're using Word 2011 for Mac, the MathType floating toolbar or MathType menu. More information in the tutorial Working with Microsoft Word.
If you're using Apple Pages, Keynote, or Numbers, look for the Equation command in the Insert menu. Note you'll need to ensure Pages/Keynote/Numbers are configured to Insert and edit equations with MathType (Pages > Preferences > General).
Whether using Word, PowerPoint, Pages, Keynote, or Numbers, after you build the equation, close the MathType window (either the X in the upper right for Windows, or the red dot in the upper left for Mac) to insert the equation into the document.
If you're using MathType with most any other application, you can 1) look for an Object or OLE Object command in the Insert menu or 2) copy & paste.
Other than that, building an equation is easy. Choose symbols and templates from MathType palettes. Alternatively, use the corresponding keyboard shortcuts. We've tried to make the most common ones intuitive -- Ctrl+F for fraction, Ctrl+R for square root (radical), etc. In general, "Ctrl" on Windows is replaced with "Command" on Mac. You can also customize the shortcuts to make them easier to remember (Preferences > Customize Keyboard).
If you're unsure of an item in MathType palettes, point to it with the mouse. Whatever you're pointing to, its name will appear in MathType status bar (the bottom of the MathType window). If the symbol or template also has a keyboard shortcut, that will appear in the status bar as well.
Symbols that are already on the keyboard (+, –, =, <, >, etc.) aren't duplicated on the MathType toolbar. If you want them there, you can add them. To do that, add them to the equation editing area, then select and drag to an empty spot on the customizable area of the toolbar (i.e., the bottom 3 rows).
MathType fonts
If you want to properly view and print documents containing MathType equations, you will need MathType fonts installed on your computer. Please read the following instructions to obtain these fonts.
Windows
The best solution is to download and install the free, fully functional, 30-day trial of MathType for Windows. This also gives you the option of editing and creating equations rather than just viewing them. After the trial period expires (or MathType is removed), MathType fonts will remain on your system.
Alternatively, you can download just MathType's fonts. Install the fonts the same way you'd install any Windows fonts. We'll be glad to help with that if you run into issues getting them installed.
Mac
The best solution is to download and install the free, fully functional, 30-day trial of MathType for Mac. This also gives you the option of editing and creating equations rather than just viewing them. After the trial period expires (or MathType is removed), MathType fonts will remain on your system. If for some reason this is not convenient or creates a problem for you, please email our technical support staff.
MathType subscription and licensing
MathType is sold as a subscription that automatically renews. The automatic renewal is for your convenience so the license doesn't expire, leaving you without the use of MathType until you renew or purchase a new license. If you'd prefer to turn off automatic renewal, you can do that by logging in to your Wiris Store account and change it there. See next section.
Wiris Store account
When you purchased MathType you should have received a welcome email, including some important information.
Among the information on the email is your MathType product key and links to download MathType to your computer or activate it for online use. There is also a button linking to the Wiris Store.
小心
Note: Depending on how you purchased MathType you may have received a password in your welcome letter, but most likely your welcome email did not include a password. To log in to the Wiris Store, click the link in your welcome email, then at the Store, click the I forgot my password link. You must log in with the same email you used when you purchased MathType
Renew an expired MathType license
If your MathType license has expired, you can only renew it if it's "recently expired". If it's been expired for several weeks or longer, you must purchase a new license in order to re-activate MathType
To renew a recently-expired license, log in to the Wiris Store as described in the previous section. Once at the Store, click Subscriptions at the top, then click the product key of the license you'd like to renew. If you see this button, you can renew:

For more information about managing your MathType subscription, please see the Store FAQ.
Upgrading MathType to the latest version
MathType will check periodically for releases that are more recent than the version you have installed. If it detects one, it will display a message showing the options:
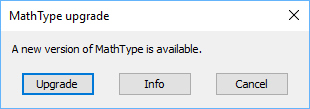
If you click Info, you are taken to the MathType download page, which has more information.
After clicking Upgrade, the download will begin:
After it downloads, the installer automatically starts. Since MT is still running, you get the next dialog...
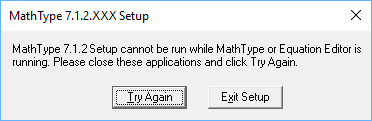
After you close MathType the installation will proceed.
MathType's Status Bar
You may already be familiar with functional status bars in modern software products. In fact, Microsoft Word has a very useful status bar, as does MathType 7 If you're not familiar with MathType 7 status bar and how it can save you some time while using MathType 7 the tips below should prove helpful.
Location of the Status Bar
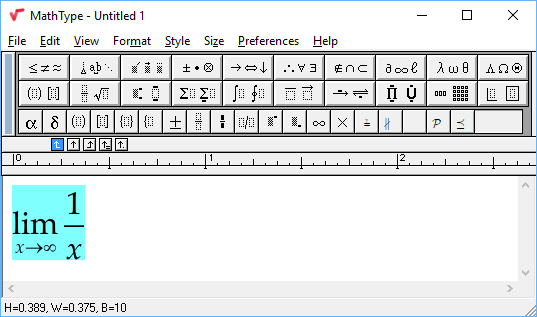
The status bar is an information area typically found at the bottom of the window in most software products. This is the MathType 7 status bar:

Information shown on the Status Bar
At a glance, it's easy to see MathType 7 status bar has information about which style (i.e., font settings) you're currently using, what size, the zoom setting, and the color. The status bar is also contextual however, displaying different information depending on the context. Consider these situations:
If you point to something with the mouse, MathType 7 will display information about the item beneath the mouse pointer. Information displayed includes the item description and shortcut key, if any.

This also works when pointing to a menu item. For example, when pointing to Format > Line Spacing, the status bar message is "Set the distance between selected lines".
When you save an equation or copy it to the clipboard, the status bar reveals the equation's height & width in inches (0.389x0.375 inches in the example below), and "baseline shift" in pixels (10px in the example below).
"Baseline shift" is the distance from the bottom of the equation to the "baseline" of the equation. In the example below, the expression needs to be lowered by 10 pixels (see example above) in order for the baseline of the equation to align with the baseline of the text (which is shown by the red line).
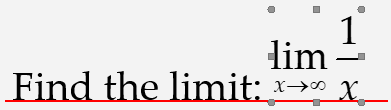
This baseline adjustment is handled automatically by some applications, like Microsoft Word and Apple Pages. If you're adding an equation to a web page or to a page layout application (such as Adobe InDesign), the amount of shift lets you know how much to move the equation.
When you have a translator selected in the Translators dialog (Preferences > Translators), and subsequently copy an equation or equation fragment to the clipboard, the status bar indicates a successful translation.

You can optionally have MathType 7 "Show character and template codes in the status bar" by selecting the option with that name in the Workspace Preferences dialog (Preferences > Workspace Preferences):
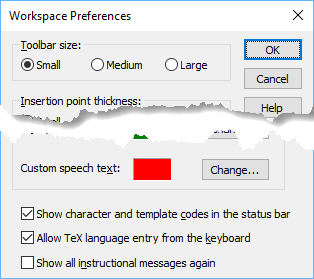
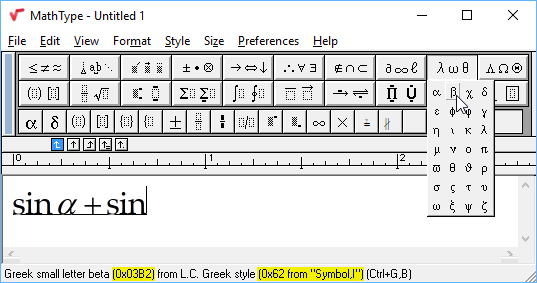
Many MathType 7 users will not want to use this option, and in fact this option is not selected by default. It is useful for advanced web page designers, as well as for those needing to write or edit MathType 7 translators. This option displays the appropriate Unicode code point for the item beneath the mouse pointer, as well as its font, when pointing to items in a symbol palette. When pointing to an item in a template palette, the status bar will display information necessary for individuals writing or editing translators.
Other ways to use MathType's Status Bar
Besides making use of the information displayed on MathType 7 status bar, you can also use the status bar to access various dialogs and change some of MathType 7 options.
Right-clicking (Windows) or Ctrl+clicking (Macintosh) lets you choose or define MathType 7 styles & sizes, change the zoom setting, or change the color.

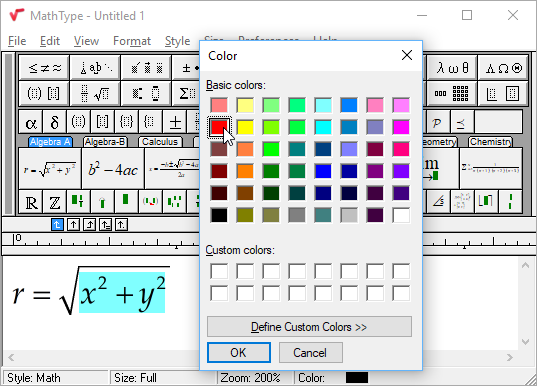
Double-clicking the Style, Size, or Zoom section of the status bar brings up the Define Styles, Define Sizes, and Zoom dialogs, respectively. Double-clicking the Color section brings up the Color dialog, where you can select a color from among several standard colors, or define a new custom color.
Working with the toolbar
Personalizing expressions in the toolbar
MathType allows you to personalize the expressions available in the toolbar. You can add all or any part of an equation you are working on to the Small Bar, the Large Tabbed Bar, or the Small Tabbed Bar, follow these steps:
Select the part of the equation…
…you want to add to a bar or choose Select All from the Edit menu.
Position the mouse pointer…
…over the selection.
Press and hold the mouse button.
A small dotted rectangle should appear next to the mouse pointer indicating you are dragging the expression.
Move the mouse pointer…
…over the bar you want to add the expression to and release the mouse button.
Editing expressions in the toolbars
To edit an expression that you have already added to the Small Bar, the Large Tabbed Bar, or the Small Tabbed Bar, right-click/ctrl+click the expression and choose Edit. This will open the expression in an equation window, allowing you to edit the expression. Once you have made changes, just close the window. The expression will be updated in the toolbar.
You can also right-click/ctrl+click the item and choose Properties from the menu to bring up the Expression Properties dialog, then click the Edit expression ... button.
小心
If you're working with MathType for Windows, you can double-click the item, and it will be opened in a separate window for editing.
Editing the status bar description for expression bar items
To change the status bar description for an expression in the Small Bar, the Large Tabbed Bar, or the Small Tabbed Bar, right-click/ctrl+click the expression and choose Properties from the menu. This will bring up the Expression Properties dialog which allows you to change the description.
Removing items from the bars
Right-click (Windows/Mac) or ctrl+click (Mac) the item and choose Delete from the menu. If you're working with MathType for Mac, this is the only way to remove an item from the toolbar.
If you're working with MathType for Windows, you can remove an item from either the Small Bar, the Large Tabbed Bar, or the Small Tabbed Bar like this:
Press and hold…
…the Alt key.
While holding…
… Alt , position the mouse arrow over the item to be removed.
Press and hold the mouse button
A small dotted rectangle should appear next to the mouse pointer to indicate you are dragging the symbol or template. You can release Alt at this point.
While continuing to press the mouse button…
…move the pointer outside the toolbar and the equation window until the mouse pointer appears as a circle with a diagonal slash, then release the mouse button.
Adding symbols and templates from the palettes to the expression bars
To add a symbol or template from the palettes to either the Small Bar, the Large Tabbed Bar, or the Small Tabbed Bar, follow these steps:
Click once…
…in the palette button to open it.
Find…
…the desired symbol or template in the palette.
Press and hold…
…the Alt key (Mac: Command key).
While holding…
… Alt / Command , position the mouse arrow over the symbol or template.
Press and hold…
…the mouse button. You can release the Alt / Command key at this point. A small dotted rectangle should appear next to the mouse pointer indicating you are dragging the item. A  symbol will appear when you are over an area that is not a valid area to add the template or symbol.
While continuing to press the mouse button…
…move the pointer over the bar that you want to add the item to and release the mouse button. As you move over a tab, the toolbar will update to display that tab's contents, to help you find where you want to add the button.
Adding symbols from the insert symbol dialog to the expression bars
To add a symbol from the Insert Symbol dialog's symbol grid to the Small Bar, the Large Tabbed Bar, or the Small Tabbed Bar, follow these steps:
Select…
…the desired symbol or character in the grid.
Press…
…and hold the Alt key (Mac: Command key.
While holding…
… Alt / Command , position the mouse arrow over the symbol.
Press…
…and hold the mouse button. You can release Alt / Command at this point.
While continuing to hold…
…the mouse button, move the pointer over the bar that you want to add the item to and release the mouse button. As you move over a Tab, the toolbar will update to display that tab's contents, to help you find where you want to add the button.
Working with the keyboard
Assigning and removing keyboard shortcuts
You can review, assign, or remove Keyboard shortcuts in several dialogs:
Insert Symbol dialog (on the Edit menu)
Use this dialog to review, assign, or remove keyboard shortcuts associated with the currently selected symbol in the grid.
Expression Properties dialog (right-click a toolbar cell and choose Properties)
Use this dialog to review, assign, or remove keyboard shortcuts associated with the selected toolbar expression.
Customize Keyboard dialog (on the Preferences menu)
Use this dialog to review, assign, or remove all keyboard shortcuts. However, you must use the Insert Symbol dialog to assign new keyboard shortcuts to characters in fonts.
The keyboard shortcut section at the bottom of each of these dialogs contains the same items and they work the same way in each:
Enter new shortcut key(s)
Enter keystrokes here to assign a new keyboard shortcut. Use Backspace or Delete to delete a keystroke. Once you have entered the desired keys, click Assign to assign the keystroke(s) to the command.
When the insertion point is in this item, you will not be able to use the normal keystrokes such as Tab to navigate around in the dialog. Press Esc to get out of this item.
Assigned to
Once you have entered some keystrokes, this item shows you to which command (if any) the keystrokes are currently assigned. Use this item to prevent accidentally removing an assignment you want to keep.
Current keys
This shows the keystroke shortcut(s) currently assigned to the command. Select a shortcut in this list and click Remove to delete a shortcut.
Assign
Once you have entered new keystrokes, this button can be used to assign them to the command. Once you have done this, the new keystroke shortcut will be displayed in the Current keys list.
Remove
Once you have selected an existing keyboard shortcut in the Current keys list, click this button to delete it.
Adding a keyboard shortcut for an expression
To add a keyboard shortcut for an expression in the toolbar, right-click it and choose Properties to bring up the Expression Properties dialog, then enter or change the keyboard shortcut assigned to the expression.
One-shot style shortcuts
One-shot style commands allow you to quickly enter a character into an equation without changing the current style. If you type the shortcut assigned to one of these commands, the style associated with the command will be used on the next character you type, if you type the next character within 4 seconds.
There are four one-shot style commands:
Greek-Symbol
The shortcut Ctrl+G / Command+G will assign the L.C. Greek or the U.C. Greek style if you type a letter, or the Symbol style if you type anything else.
User 1
Ctrl+U / Command+U will assign the User 1 style to the next character you type.
User 2
Ctrl+Alt+U / Option+Command+U will assign the User 2 style to the next character you type.
Vector-Matrix
Ctrl+B / Command+B will assign the Vector- Matrix style to the next character you type.
The shortcuts shown here are MathType defaults. You can assign different shortcuts using the Customize Keyboard dialog under the Style for Next Typed Character category.
Using TeX language input
MathType allows keyboard input of a subset of TeX supported by Wikipedia. See the help topic Displaying a formula in the MediaWiki handbook for an explanation of this language.
To use this feature, you need to enable the Allow TeX language entry from the keyboard option in the Workspace Preferences dialog in the MathType Preferences menu.
Entering equations
Equations typed using TeX in MathType must begin with the characters $, \, ^, or _. This switches the editor to an input mode, which changes the text color to grey. Once you have completed entering an equation, exit input mode by pressing Enter on the keyboard. MathType will then convert the TeX to a MathType 7 equation.
For example, entering this TeX expression into MathType

will result in this MathType 7 expression after you press or tap Enter:

Errors
MathType 7 will attempt to parse as much of the input as it can, and show the errors it encounters in red. To correct errors, choose Undo from the Edit menu, or Ctrl-Z, to return to input mode.
Copying/pasting
TeX can be pasted into MathType whether or not the Allow TeX language entry from the keyboard option has been enabled. This is useful when pasting equations copied from Wikipedia or other sources.
Using the Math Input Panel (Windows only) with MathType
To use, follow these steps:
Choose the Open Math Input Panel… command in MathType Edit menu.
When the MIP appears, write the equation in the MIP writing area.
Confirm your equation in the preview area.
If the equation is incorrect, use one of the correction buttons.
Once you've confirmed the accuracy of the equation, tap Insert to place the equation into MathType

Using the Math Input Panel with Word
To use, follow these steps:
Choose the Open Math Input Panel… command in the Insert Equations group of the MathType 7 tab in Word.
Write the equation in the MIP writing area.
Once you've confirmed the accuracy of the equation, tap Insert to place the equation into MathType
Using the Math Input Panel with PowerPoint
There is no direct command in PowerPoint that will open the MIP. Follow the instructions for Inserting handwritten math in PowerPoint.
Working with files
MathType has several different file types you can choose from when saving or exporting equations. Many times you can choose the appropriate file type by knowing which works best with the application you're using. For example, if you're using Adobe InDesign, EPS is best, but if you're using a drawing program on Windows, the WMF format may be best. Sometimes an application can accept more than one type of format, so you will have to decide based on other criteria. The resolution of the image is one bit of information that might enter into your decision. Compare these examples of EPS, GIF, and WMF equations (left-to-right), all of which were created with 10pt Times New Roman font. Images are zoomed 300% for better comparison:

You may look at these examples and wonder why you'd ever choose GIF. As mentioned above, sometimes it depends on the application into which you're adding equation images. For example, of the 3 formats mentioned here, GIF is the only one appropriate to use on web pages. There are techniques you can use to increase the quality, such as increase the size in MathType and reduce it in the document so it displays it at its normal size. The point of this section is that you have a choice.
EPS (Encapsulated PostScript)
EPS is a file format used for graphics in desktop publishing applications like Adobe InDesign and QuarkXPress.
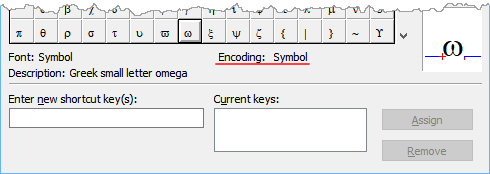
For EPS output to work correctly, the font assignments in MathType Style > Define dialog for LC Greek and UC Greek must use a font with the Symbol encoding. To verify Symbol encoding for a particular font, open MathType Insert Symbol dialog, and beneath the font grid there will be information displaying the Font name, the Description of the selected character, and the Font Encoding:
GIF (Graphics Interchange Format)
GIF is a graphics file format generally used for line art (as opposed to JPEG which is best for photographs) in Internet publishing applications. Save equations in this format when creating web pages.
WMF (Windows Metafile)
This is the standard graphics file format for the Microsoft Windows family of operating systems. Although the metafile format can accommodate bitmap images, the metafiles created by MathType are "draw"-style graphics, and are therefore scalable and will print at full resolution.
TIFF (Tagged Image File Format)
TIFF is a graphics file format originally created to be used with PostScript printing, but is also popular for use with high color depth images. You cannot save a MathType 7 equation directly as a TIFF. One of the options in MathType for saving EPS files is to save with a TIFF preview image. This option is useful when importing EPS equations into software that either does not produce its own preview image, or produces only a low-resolution preview.
PDF (Portable Document Format – Mac only)
PDF is an open standard document format that is the native metafile format for macOS. Use this file format when not working with Microsoft Office or Apple Pages, unless your application requires one of the other file formats.
PICT (Mac Picture)
PICT is a graphics file format for the Mac family of computers. Although the PICT format can accommodate bitmap images, the PICTs created by MathType are "draw"-style graphics and, therefore, are scalable and will print at full resolution.
Working with Insert Symbol
Inserting a specific character or symbol
Place the insertion point where you want the new character to be inserted. Then insert the character by one of the following two methods:
Method 1: Using the symbol palettes:
Use the mouse or the keyboard to find the desired symbol in the symbol palettes.
Click the symbol in the palette.
Method 2: Using the Insert Symbol dialog:
Choose Insert Symbol from the Edit menu.
Find the character or symbol desired.
Double-click the character or symbol (or select it and click Insert).
Finding a symbol by matching words in its description
To find a character or symbol by matching words in its character description, perform the following steps:
Choose Insert Symbol from the Edit menu to bring up the Insert Symbol dialog
Choose Description from the View by list.
Click the New search button to bring up the Insert Symbol Search dialog
Enter words and/or phrases that might be in the description
Click OK to get back to the Insert Symbol dialog
Look among the matching symbols in the grid for your symbol
Using fonts
Styles
Each character in a MathType 7 equation is either directly assigned a specific font and character style, or is assigned one of eleven MathType 7 styles. MathType styles are somewhat analogous to text styles in word processing and page layout applications. Each one is defined as a combination of a font and character style (e.g., Times/bold/italic or Symbol/bold). Styles save you from having to worry about fonts and character styles separately, and hence speed up your work and help you maintain consistency in your equations. Also, by changing the definition of a style, you can quickly change the appearance of all the characters that use it.
The styles available in MathType are Text, Function, Variable, Lower-case Greek, Upper-case Greek, Symbol, Vector-Matrix, Number, and Extra Math. MathType also has User 1 and User 2 styles. It will assign certain styles to certain kinds of characters automatically, based on its knowledge of mathematics and typesetting conventions. This intelligent assignment of styles is a unique feature of MathType 7 which significantly increases your productivity and reduces typographical errors.
Blackboard bold (double-stroked)
This is a style of font often used in mathematics to represent number sets – ℕ for the set of natural numbers and ℝ for real numbers, for example. MathType 7 Euclid Math Two font contains the commonly-used blackboard bold characters.
小心
Tip Assign the Euclid Math Two font to the User 1 (or User 2) style using the Define Styles dialog. From then on, whenever you want to enter a blackboard bold character, type Ctrl+U / Command+U (or Ctrl+Alt+U / Option+Command+U for User 2) followed by that character.
Fraktur (Old German)
This is a style of font often used in mathematics. MathType 7 Euclid Fraktur font contains the full Fraktur alphabet (e.g., 𝔄, 𝕴, 𝖆, 𝖇).
小心
Tip Assign the Euclid Fraktur font to the User 1 (or User 2) style using the Define Styles dialog. From then on, whenever you want to enter a Fraktur character, type Ctrl+U / Command+U (or Ctrl+Alt+U / Option+Command+U for User 2) followed by that character.
Tiger fonts: Support for braille math
Tiger fonts were developed by ViewPlus to be used for math braille output. By using Tiger fonts, it's possible to emboss Word documents with math on ViewPlus braille printers. The math is embossed in DotsPlus, which uses conventional math notation except for letters, numbers, and a few symbols.
In order for the Tiger fonts to work properly with MathType all styles must be set to Tiger fonts. The easiest way to make this change is to use one of the two Tiger Preference Files supplied with MathType – either Tiger or TigerExpert. To load a preference file, in MathType Preferences menu, choose Equation Preferences > Load from File. Choose the Tiger preference file you want and click Open.
Refer to Tiger Software Suite documentation for additional instructions in using Tiger fonts.
Letting other people view and print your documents
If you give someone a document that contains MathType 7 equations, he or she will need to install all fonts used by the document and its equations in order to properly view and print the document. The same applies for individual equation files, except for GIF files which are bitmaps and therefore do not require fonts.
You can send the fonts to your associate along with the document. This is OK with the MathType 7 fonts, but be aware it may violate your license agreement for the other fonts.
If possible, refer people that want to view or print your documents to the Wiris website to download the font installers, rather than sending them in email or on disk. This will ensure that they get the latest versions.
Remember, if your document or its equations use other fonts besides MathType 7 these must also be installed in order to print or view them.
Adding to MathType's font and character knowledge
MathType 7 has a database of characters, and it uses this information to make decisions like:
How much space will be inserted around the character
Which of MathType styles should be assigned to it
What description will be shown in the Status Bar and in the Insert Symbol dialog
MathType also contains information on what characters are present in the fonts installed on your computer, both MathType 7 own fonts and any other fonts you might have.
Although MathType has knowledge of many of the mathematical characters and fonts that are in common use, it can't possibly know them all as there are literally thousands of fonts in existence.
We expect to continually add to MathType font and character database with new releases. If you want to add information for your own fonts and their characters, please contact us for more information.
You can also add information to MathType font and character knowledge yourself by modifying the file fontinfo.ini which is located in the Fonts folder inside the MathType folder. See the contents of fontinfo.ini for instructions. For more information, visit the support section of our website.
Using Equation Conversion Manager (Windows only)
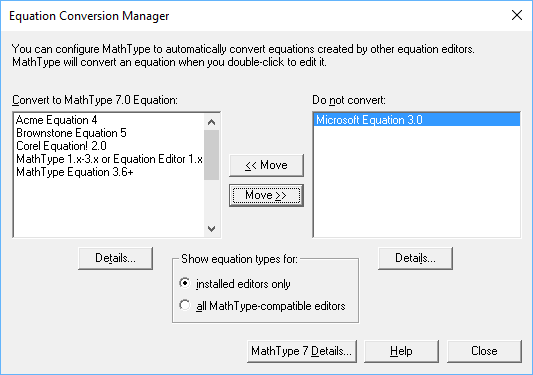
You can use the Equation Conversion Manager to control the kinds of equations for which MathType will be the designated editor. For example, once you have installed MathType double-clicking an equation you created using the Equation Editor that came with Microsoft Office (i.e., Microsoft Equation 3.0 – not the OMML editor that was introduced in Word 2007) will automatically convert it to a MathType 7 equation. If you don't like this, Equation Conversion Manager is the tool you use to change it.
Running the Equation Conversion Manager
To run the Equation Conversion Manager, choose it from the MathType 7 sub-menu of the Windows Start menu. A dialog will be displayed with two lists of equation types:
The left list contains equation types that will be converted to MathType equations when you double-click them.
The right list contains equation types that will not be converted, but will be edited using the equation editing application that was used to create them.
Use the two Move buttons in between the lists to move selected equation types from one list to the other.
Show equation types for
This part of the dialog allows you to show just those equation types for which the editor is installed (installed editors only) or show all equation types even for those that are part of products you do not own (all MathType 7 editors). The latter choice allows you to decide which editor is used for equations contained in a document that an associate might give to you.
Details
Click this button to see details of each equation editor's OLE registration. This is information that is only useful for troubleshooting OLE problems.
MathType details
Click this button to see details of MathType OLE registration. This is information that is only useful for troubleshooting OLE problems
Other topics
Drag & drop
Any selected part of an equation may be moved or copied to the toolbar or some other place in the equation by using the drag-and-drop technique:
Select the part of the equation you want to move or copy.
Click inside the selection with the mouse and hold the mouse button down.
While continuing to hold the mouse button down, move the mouse pointer over the place you want to move or copy to.
When the mouse pointer is in the desired position, release the button to complete the operation.
Normally, the selected part of the equation will be moved to the new location but, if you hold the Ctrl / Option key down while dragging, it will be copied, leaving the original material intact.
Similarly, you can move or copy a toolbar item within the toolbar by holding the Alt / Command key down while clicking and then dragging it to another place on the toolbar.
Replacing one template with another
Sometimes it is necessary to replace one template in your equation with another after you have already filled the template's slots. To avoid having to do a lot of cutting and pasting or re-entering of the expressions, you can replace the original template by another different one from the toolbar. Follow these steps:
Select the template and its contents to be replaced. Be careful not to select adjacent characters or templates.
While holding the Ctrl / Option key down, select the new template from the Template Palettes.
The new template will replace the old one and the expressions in the original template's slots will be moved to the corresponding slots of the new template.
Ruler
MathType ruler is divided into three panes, the Tab Well pane, the Ruler pane, and the Tab Stop pane.

Tab well pane and tab stop pane
MathType tabs work roughly the same as those found in most popular word processing applications. You choose the type of tab you want by clicking its tab well on the ruler. There are five tab wells to choose from:
Left tab
Center tab
Right tab
Relational tab
Decimal tab
Click one of the five tab wells to choose the tab stop type, then click in the Tab Stop pane to set the position of the tab stop.
Each slot in an equation has its own tab stops. If you press Enter within a slot or at the end of a line, you create a pile. The same tab stops apply to every line in the pile. The ruler shows only the tab stops belonging to the current slot or pile (the one containing the selection or insertion point). To remove a tab stop, drag it downward away from the ruler. To change the location of an existing tab stop, drag it along the ruler. The small inverted T marks on the ruler are default tab stops, and are placed every ½ inch, regardless of the ruler units.
Effects of tab characters
Pressing Ctrl+Tab will insert a tab character into your equation. If you just press the Tab key, this moves the insertion point, so to enter tab characters you must hold down the Ctrl key. Tab characters inserted in this way divide the items in a line into several groups, called tab groups. Left, Center, and Right tabs align the characters along the left edge, center, or right edge of the group, respectively.
A relational tab aligns its tab group at a relational operator, including the =, <, >, ⊆, ∼, any symbol from the Relational symbols palette, as well as most of the relational operators and set theory symbols you may find with the Insert Symbol dialog.
A decimal tab will align a column of numbers at either a period or a comma, depending on your Regional and Language Options in the Windows Control Panel. If one of the numbers does not have a period or comma, it will align to the right of the number's units digit.
Ruler pane
The ruler pane gives you a convenient gauge to monitor the size of your equation, as well as to align multiple expressions on the same line and to align the lines in a pile. The default unit for ruler graduations is inches. If you prefer to work in centimeters, points, or picas, double-click the ruler pane to bring up the Ruler Units dialog. Make your choice of ruler units and click OK.
Status Bar
The Status Bar is displayed along the bottom edge of every equation window. It contains four areas that show the settings that will be used for material you subsequently type:
Style
This area shows which of MathType styles will be assigned to characters you enter. Normally, this is Math which means MathType 7 will automatically assign styles based on which characters you type: the Function style for functions, the Variable style for variables, and so on. You can cause characters you type to have a specific style or font by choosing commands from the Style menu. As a shortcut, you can also right-click in this status bar area to choose from the same menu.
Size
This area shows which of MathType typesizes will be assigned to characters you enter. Normally, MathType will automatically assign sizes based on the position of the slot containing the insertion point or selection; Subscript size in a subscript or limit, for example. You can cause characters you type to have a specific size by choosing commands from the Size menu. As a shortcut, you can also right-click in this area to choose a new size.
Zoom
This area shows the current viewing scale for the window. This can be changed by choosing commands from the Zoom sub-menu on the View menu or by double-clicking in this area to bring up the Zoom dialog. You can also right-click in this area to choose a new zoom scale.
Color
This area shows which color will be assigned to characters you enter. To change this color, choose commands from the Color sub-menu on the Format menu or double-click this area to bring up the Color dialog. As a shortcut, you can also right-click in this area to choose a color.
小心
Tip You can double-click any of the areas on the status bar to display the relevant dialog, or right-click to display the appropriate menu.
Pasting tables and spreadsheet cells
MathType includes an easy-to-use mechanism for building matrices and tables via the Matrix templates palette and Matrix dialog. You can also copy tables and spreadsheet cells, and paste them into MathType 7 as matrices.
Input from spreadsheets
To create a matrix in MathType from data in an Excel spreadsheet, select the cells containing the data, then copy and paste into MathType 7 In general, the formatting will not carry over from Excel to MathType 7 but the "shape" of the copied region will. For example, if you're copying a block of data in Excel that's 5 rows by 2 columns, this will result in a 5×2 matrix in MathType 7
A single row of data will result in a single line of characters in MathType 7 – not a row matrix.
A single column of data will result in a properly-formatted column matrix in MathType 7
小心
Note Although we specify Excel here, this should also work with Google Docs spreadsheets, and probably others. It does not work with OpenOffice.
Converting text to matrices (from a text editor or word processor)
It's possible to define matrices in plain text format, then paste them into MathType and MathType 7 will format the matrix accordingly.
A 1-column or 1-row matrix may be a valid matrix, but you'll need to create this from scratch in MathType 7 (or paste it from a spreadsheet). Pasting a single column of numbers into MathType will result in a pile. Pasting a single row of data results in a single line of characters in MathType 7 Hence, the minimum size of a "plain text" matrix is 2×2.
You must separate matrix cells with Tab characters (i.e., tab-delimited data).
To create a new row, create a new line of text (i.e., press Enter ).
Empty cells are OK; just use Tab as the empty character. Example:
a11
{tab}
a13
{tab}
a21
{tab}
{tab}
a22
Every line of text in the matrix definition should have the same number of cells.