
-
MathType
-
WirisQuizzes
-
Nubric
-
CalcMe
-
MathPlayer
-
Store FAQ
-
MathFlow
-
BF FAQ
-
Miscellaneous
-
Wiris Integrations
MathType 7 with Microsoft Office 2016 or later
Reading time: 45minMathType 7 is available for:
- Windows
- Word and PowerPoint 2021 or earlier
Download MathType 7 for Windows
Caution: If you are looking for a math editor to use with Word desktop, online and iPad, please visit this page to know the MathType add-in for microsoft 365 that we recommend you use. MathType 7 has some limitations that the add-in for Microsoft 365 does not have.
Caution:
MathType with macOS Mojave: The first time you use MathType with any Office application on Mojave, you'll see this dialog:

When you see this dialog, you must click OK to authorize the application to launch MathType If you don't, you won't be able to use MathType with Office. Likewise, when you create your first equation under Mojave, you'll see this dialog when you close MathType to insert the equation into the document:

You will see both of these dialogs only once. Click OK. This will enter the equation into the document. If you mistakenly did not allow access, see our TechNote for the solution steps.
MathType's support for Microsoft Word
Tip: If you use both Microsoft Word and Google Docs, or if you and/or your employer has converted from Microsoft Office to Google Docs, you may be interested in our tip Word document compatibility with Google Docs. This tip describes how to
- Upload a Word document with MathType equations to Google Docs for students and/or colleagues to read but not edit.
- Upload a Word document with MathType equations to Google Docs and end up with equations you can edit in MathType for Google
- Open a Google Docs document, with equations created with MathType for Google download the document and convert the equations such that they're editable in MathType (i.e., MathType for Word).
How do you integrate MathType in Word?
MathType adds several commands to Microsoft Word that you will find useful when creating and working with documents containing equations. You will find these commands on the MathType tab in Word's Ribbon.
MathType 7 Setup automatically installs MathType 7 support for Word, for each version of Word it detects on your computer. However, if you install a new version of Word after you install MathType the commands will not be available for the new version of Word until you re-install MathType
If you want to remove the MathType 7 commands temporarily from…
- Word for Windows, open Word Options (via the Office Button or File tab), then click Add-ins. In the Manage box, click Templates, and then click Go. Uncheck the box next to the MathType 7 Commands item. To remove them permanently, quit Word and remove the MathType 7 commands from Word's startup folder.
- Word for Mac, open Templates and Add-Ins from the Tools menu. Uncheck the box next to the MathType 7 Commands item.
Please note: A few of our customers have reported equations being converted into pictures without any warning. This is due to a bug in Word. If this happens, we're not aware of any way to recover the equations. Please see our TechNote with more information about this Word bug.
MathType tab in Word
NOT Word 2011 for Mac. Please see the section below for that version.
If MathType has been installed a MathType 7 tab will appear in Word with specific commands and sections.

Insert Equations group

 Insert Inline Equation
 Ctrl+Alt+Q (Windows), Ctrl+Q (Mac)
Opens a new MathType window ready for you to enter an equation. If you have defined equation preferences for new equations (using the Set Equation Preferences command), these settings will be used in the MathType window. Otherwise MathType 7 current preferences for new equations will be used. The resulting equation is inserted inline, i.e., aligned with the surrounding text.
 Insert Display Equation
 Alt+Q (Windows), Option+Q (Mac)
Opens a new MathType window using equation preferences as described above under Insert Inline Equation. The display equation is inserted on a new line and centered between the left and right margins.
To simplify changing the formatting for all of the display equations in a document, a Word style called MTDisplayEquation is created that defines the position of the center tab stop. This means that you can change the alignment of all of the display equations in a document by simply modifying this style.
 Insert Right-Numbered Display Equation
 Alt+Shift+Q (Windows), Option+Shift+Q (Mac)
Similar to Insert Display Equation, but also inserts a right-aligned equation number following the equation. The MTDisplayEquation style defines the location of the right margin tab stop.
 Insert Left-Numbered Display EquationCtrl+
Alt+Shift+Q (Windows), Ctrl+Shift+Q (Mac)
Similar to Insert Display Equation, but also inserts a left-aligned equation number before the equation. The MTDisplayEquation style defines the location of the center tab stop.
 Open Math Input Panel…
 Ctrl+Shift+M (Windows)
Windows only: (Windows 7 and later) Insert an equation by handwriting it in the Math Input Panel (MIP). When you click the MIP Insert button, the equation will be placed at the insertion point. This command is not available in versions of Windows earlier than Windows 7.
Symbols group

The controls in the symbols group contain common mathematical symbols as well as many other symbols and characters for use in the document. For more information about inserting symbols in Word, open Word's help by hovering over Other in the Symbols Group and pressing the F1 key.
Note: While you can create inline equations in MathType 7 consisting of a single symbol, we recommend you insert symbols from the Symbol Group on the MathType 7 tab instead. Equations have more overhead in the document, and for large documents the difference can be significant.
Equation Numbers group

Insert Number
- Insert Number: Inserts an equation number at the insertion point. The default format includes a section number and an equation number. The equation number increments each time you insert a number. You can define the section number using Insert Break… under Chapters & Sections. Use Format… to set or change the number format.
- Format…: Opens the Format Equation Numbers dialog, which allows you to change the format of new and/or existing equation numbers. You can also turn off automatic updating of equation numbers and references in this dialog.
- Update: Updates all equation numbers and equation references in the document, including those in footnotes and endnotes. You need to use this command if you turn off automatic updating in the Format Equation Numbers dialog, or if you move or delete any equation numbers in your document.
Insert Reference
Inserts a reference to an existing equation number. It inserts a copy of the referenced equation number at the insertion point. In addition, if you double-click on a reference your document will scroll to the referenced equation. When equation numbers are updated, equation references will be updated as well.
Place the insertion point at the place where you wish to insert the reference, and click this button (the Insert Equation Reference dialog will appear). Next, double-click on the equation number you want to reference (you may have to scroll the document to find the equation).
Chapters & Sections
- Insert Next Section Break: Inserts a section break and numbers it by incrementing the number of the previous section break.
- Insert Next Chapter Break: Inserts a chapter break and numbers it by incrementing the number of the previous chapter break.
- Insert Break…: Opens the Insert Chapter/Section Break dialog, which allows you to insert an equation section break. Equation sections define the section number used in equation numbers.
- Modify Break…: Opens the Modify Chapter/Section Break dialog, which allows you to locate and modify the current chapter/section break (the one preceding the current position of the insertion point).
Browse group

The Browse group allows you to browse up or down through the document, stopping at Equations, Equation Numbers, or Chapter/Section Breaks.
Format group

Equation Preferences: This command opens the Set Equation Preferences dialog, which allows you to specify the equation preferences to be used for new equations you insert into the document.
Format Equations: Opens the Format Equations dialog, which allows you to change the format of the equations in the current selection or the entire document.
Convert Equations: Opens the Convert Equations dialog, which allows you to convert equations in your document to a format you specify (including TeX or MathML).
Publish group
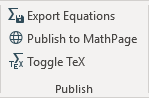
Export Equations: Opens the Export Equations dialog, which allows you to export the equations in your document into individual graphics files.
Publish to MathPage: Opens the Publish to MathPage dialog, which allows you to export the document as a Web page including MathPage technology to handle the equations.
Toggle TeX Alt+\ (Windows), Option+\ (Mac): The Toggle TeX command allows you to type Texvc directly into a Word document and convert it into a MathType 7 equation. Since it's a "toggle", choosing the command again will return the MathType 7 equations to Texvc.
MathType group

MathType 7 Help
- Table of Contents…: Opens this documentation.
- Using MathType 7 in Word…: Opens MathType 7 Help for Microsoft Word (i.e., this section of the documentation).
- Unlock/Register MathType 7 Gives you information on how to enter your product key to unlock MathType as well as register your product so you can receive free technical support, upgrade notices and special upgrade pricing.
-
About MathType 7 Displays MathType About box showing you:
- The version of the MathType application you are currently using
- Copyright information
- Your product registration information, including your partial product key if you have unlocked MathType or the number of days left in the evaluation period if MathType 7 is in evaluation mode
MathType 7 on the Web
- MathType 7 Home Page…: Opens the MathType 7 home page (e.g. http://www.wiris.com/mathtype for English).
- Online Support…: Opens the tech support area of the MathType 7 Web site, where we have many tips and tech support notices that will give you help solving problems and information on compatibility with other applications.
- Send Feedback by Email…: Opens your email program so that you can send feedback to Wiris regarding your experiences with MathType 7 or to request future enhancements. If you have a problem using MathType 7 or a bug to report, please visit our online tech support area first.
- Order MathType 7 Opens the e-commerce area of the Wiris Web site where you can purchase MathType 7 (or any of our other products).
Future MathType 7
Opens a page on our website that will allow you to give us your ideas for future enhancements of MathType and MathType
Dialog box launcher
Opens MathType Options dialog.
MathType toolbar and menu in Word 2011 for Mac
Warning: Microsoft support for Office 2011 ended on October 10, 2017. MathType 7 7 will continue working with Office 2011, but we will not maintain this integration. Please consider upgrading to newer versions of Office to continue having the best experience. Beginning with MathType 7 8, we will not support Office 2011.
MathType floating toolbar
The MathType toolbar contains the most frequently used commands on the MathType 7 menu. You can hide or show the MathType toolbar by checking or unchecking MathType 7 in the Toolbars flyout in Word's View menu

The toolbar contains the following commands (refer to the MathType menu descriptions for more information about the commands):
 Insert Inline Equation
 Ctrl+Option+Q
 Insert Display Equation
 Option+Q
 Insert Left-Numbered Display Equation
 Ctrl+Option+Shift+Q
 Insert Right-Numbered Display Equation
 Option+Shift+Q
 TeX
TeX Option+\
(Note: On some non-English keyboards, the keyboard shortcut for Toggle TeX will be Control+X .)
 Insert Equation Number
 Insert Equation Reference
 Insert Chapter/Section Break
 Update Equation Numbers
 Publish to MathPage
 Browse Equations, Equation Numbers and Chapter Headings
MathType menu in Microsoft Word
The MathType 7 menu added to Word's menu bar contains the complete set of MathType 7 commands for Word. In order to conserve screen space, the MathType 7 Toolbar contains only the most frequently used commands, by default.
The commands apply to the current document only. The menu contains similar commands to the ones described above.
Inserting MathType equations
The MathType 7 commands for Word provide six methods for inserting MathType 7 equations into Word documents. These are:
- Inserting an inline equation
- Inserting a display equation
- Inserting a right-numbered display equation
- Inserting a left-numbered display equation
- Open Math Input Panel
- Toggle MathType 7
We recommend that you always use one of these commands to insert equations as they work properly with the equation preferences commands that help ensure consistency between the equations in your documents.
The Insert Inline Equation command inserts a MathType 7 equation at the insertion point. The equation is adjusted to align itself with the surrounding text, so use this command when you want to insert an equation in a sentence.
Note: While you can create inline equations consisting of a single symbol, we recommend you use Word's Insert Symbol command instead. Equations have more overhead in the document, and for large documents the difference can be significant.
The Insert Display Equation and Insert Left/Right-Numbered Display Equation commands are very similar. They insert a new line if the insertion point isn't already on a new line, and then insert an equation centered between the left and right margins. The Insert Right-Numbered Display Equation command inserts a right-justified equation number following the equation, while the Insert Left-Numbered Display Equation command inserts a left-aligned equation number before the equation.
A Word style named MTDisplayEquation is added to the Word document the first time you use any of these three commands. This style defines the center tab and the right tab positions. Its other formatting is based on the style in use at the time it's created. You can change the alignment of all the display equations in a document by modifying this style using the Style command on Word's Format menu. This style is created separately for each document into which you insert a display equation.
The Open Math Input Panel command (Windows 7 and later) brings up the Math Input Panel (MIP). Write the equation in the MIP and when you're finished, click the Insert button. The equation will be placed at the location of the insertion point. Functions in your list of Functions Recognized are also recognized in the MIP.

The Toggle MathType 7 command allows you to type Texvc directly into a Word document and convert it into a MathType 7 equation. Since it's a "toggle", choosing the command again will return the MathType 7 equations to TeX. When typing TeX, using either the $…$ or \(…\) delimiters results in a MathType 7 Inline Equation after applying the toggle, and using either the $$…$$ or \[…\] delimiters results in a MathType 7 Display Equation after the toggle. To use the toggle with a single equation, click the Toggle MathType 7 icon and the equation nearest the insertion point will be converted to a MathType 7 equation. To convert the entire document, select the document contents (Ctrl+A); to convert part of it, select the part you want to convert. Click the toggle. To convert the equations back, repeat the procedure. See important note in the Typing TeX directly into Word section below.
Inserting and opening equations using keyboard shortcuts
MathType 7 equations can be inserted in a Microsoft Word document using keyboard shortcuts. The equation will be inserted at the current cursor location in the document. There are shortcuts for each type of MathType 7 equation.
- Insert inline equation (
Crtl+Alt+Q; Mac:Ctrl+Q) - Insert display equation (
Alt+Q; Mac:Option+Q) - Insert right-numbered equation (
Alt+Shift+Q; Mac:Option+Shift+Q) - Insert left-numbered equation (
Ctrl+Alt+Shift+Q; Mac:Ctrl+Shift+Q) - Open Math Input Panel (Windows only:
Ctrl+Shift+M) - Toggle MathType 7 (
Alt+\; Mac:Option+\. Note: On some non-English keyboards, the keyboard shortcut will beControl+X.) - Open equation for editing in a separate MathType window (
Alt+O/Command+Option+O)
Numbering equations
The equation numbering commands allow you to insert equation numbers in a Word document in a variety of formats. You can also insert references to these numbers. Both numbers and references are automatically updated whenever you add new equation numbers to the document. Equation references can also be placed in footnotes and endnotes.
The equation numbers are quite separate from equations in a Word document. If you delete an equation its equation number (if any) is not automatically deleted. Similarly, an equation reference is actually a reference to an equation number, rather than a reference to the equation itself.
The format of equation numbers in a document is defined using the Format Equation Numbers dialog. Equation numbers are made up of a chapter number, a section number, a separator, an equation number and an enclosure. This allows numbers such as (1.1.1), [I.i], {A.a}, or even Equation 1.1. The chapter number, section number, separator and enclosure are all optional, so you can create equation numbers such as (1.1), 1.1, or just 1 or a.
Note: It's not possible with MathType 7 to construct equation numbers such as 1.1, 1.2a, 1.2b, 1.3, etc. This is something we're considering for a future version of MathType If this is something that's important to you, please let us know.
If you are using the chapter and/or section numbers, you must insert a chapter/section break before the first number to define the chapter/section values. A break can have an explicit value or be set to increment by one the value of the preceding equation section.
As you edit a document, equation numbers or references may get out of sequence (e.g., you move sections around). Use the Update Equation Numbers command in the Ribbon to update the sequence. If you select a region of your document, only this region will be updated, which can be useful with very large documents where updating can take a relatively long time.
Inserting equation numbers and references step-by-step
To insert equation numbers and references in a Word document, follow these steps.
Define…
…the desired number format for this document using the Format Equation Numbers command. You can change this format at any time, for either all existing equation numbers, just the selected equation numbers, or for new equation numbers.
Create a chapter/section break…
…using the Insert Chapter/Section Break command. You should insert this in the document ahead of the first equation number you plan to add. The breaks are inserted as hidden text so that they won't normally appear.
Note: If you haven't already set your Chapter/Section breaks, when you insert your first equation number or a numbered equation, the Insert Equation Number dialog appears, which allows you to set the chapter/number breaks.
Place the insertion point…
…at the desired location and use the Insert Equation Number command to insert an equation number.
Equation reference
To insert a reference to this equation number, place the insertion point in the desired location for the reference and choose the Insert Equation Reference command. Then, double-click the equation number to be referenced, and the reference will be inserted at the original location.
Modify break
To modify the chapter and/or section values of a break, use the Modify Chapter/Section Break command. The closest preceding chapter/section break will be made visible and selected, and in the dialog that appears you can modify or delete the break.
View all breaks
To view all chapter/section breaks, click the Show/Hide button  in Word. To hide them, click this button again (you don't need to hide them when printing, as they won't appear in the printed output). When equation section breaks are shown, a quick way to open the Modify Chapter/Section Break dialog is to double-click on a break.
What about inserting a number in the middle?
If you insert equation numbers out of sequence, the existing numbers and references will be automatically updated. If you copy, move or delete an equation number or reference, however, you must use the Update Equation Numbers command to refresh the sequence.
Updating numbers & references
The equation number updating that occurs after you insert an equation number is usually very fast. However, you may find this updating takes a while if you are working on a slower computer or on a large document containing many equation numbers and references. The Format Equation Number dialog contains an option to turn off automatic updating. After you've finished entering equation numbers, be sure to use the Update Equation Numbers command to refresh the numbering sequence.
Note: Update Equation Numbers works on selected text, or the whole document if there's no selection. For large documents it may be faster to select and update just the section of the document that requires it. But if you've made lots of changes, it's safest to update the entire document.
Browsing by equations, equation numbers and chapter/section breaks
The MathType 7 browse controls allow you to search through your documents for three types of objects:
- Equations. Traverses all equations.
- Equation Numbers. Steps though all the Equation Numbers created by MathType 7
- Chapter/Section breaks. Helps find the normally invisible Chapter/Section breaks. The current chapter/section break will appear in red until you click the Previous or Next buttons, or elsewhere in the document.
Note: When browsing by Chapter/Section breaks, the breaks become visible and remain visible after browsing is complete. You can make the breaks disappear again by clicking the Show/Hide show-hide icon on the toolbar or ribbon. To start the search, use the dropdown list to select the object to search for and click the Next or Previous buttons. The browse feature will search all visible parts of the document starting at cursor position. This includes headers and footers, if visible.
Using Equation Preferences
When you create a document containing equations, you typically want all of the equations to use the same fonts, sizes, and spacing so they look consistent throughout the document. We recommend you save these equation settings in a MathType 7 preference file so you can reload them into MathType if you need to create new equations in this particular document again. MathType 7 equations contain the preferences they were created with, and these preferences are used when the equation is edited in MathType
However, you may be working on several different documents that each use different equation preferences. In this situation it can be awkward to keep loading preference files, and even to remember which preference file is associated with each Word document.
The Equation Preferences command allows you to save equation preferences inside your Word document. Whenever you insert a new equation in this document these preferences will be used for the new equation instead of MathType 7 current preference settings for new equations. This allows you to create equations that look similar without having to remember which preference file you originally used. Also, if you send the Word document to another MathType 7 user any equations he or she inserts will also use the correct equation preferences.
To save equation preferences in a document, follow these steps:
Set desired preferences
In MathType set your desired preferences using the Define Styles, Define Sizes, and Define Spacing dialogs.
Save preferences
Save these preferences as a MathType 7 preference file using the Save Preferences dialog.
Open the document
In Word, open the document and choose the Equation Preferences command on the MathType tab.
Assign preferences to document
In the Set Equation Preferences dialog choose the This document's equation preferences option, click the Load from MathType 7 preference file button and select the file you just saved.
View the assigned preferences
You can view the preferences by clicking the Preview button.
Click OK and the contents of the file will be copied into the Word document (for the curious, they are saved as a custom document property).
Format Equations
Note: This command allows you to change the formatting of all MathType 7 Equation Editor, and Word EQ field equations in the chosen range. It applies the equation preferences (styles, sizes, spacing) you choose to all equations in the current selection or the entire document. Note:
- Equation Editor equations and Word EQ fields will be converted to MathType 7 equation objects by this operation. If you do not want this to happen, you must choose a range that omits them.
- If you have OMML equations in the document (i.e., created with the "new" Microsoft equation editor), the Format Equations will pass over them and not affect their appearance. If you want to reformat these equations, you'll need to first run the Convert Equations command.
To reformat the equations in a Word document, follow these steps:
Work with a copy of the document
Save a copy of your Word document. (This is always a good idea.)
Select the range
Select the equations you want to reformat, or make no selection to reformat the whole document.
Open the dialog
Choose or click Format Equations to open the Format Equations dialog.
Which preferences to use?
Select the equation preferences you want to use for the equations. If you've set up preferences for this document with the Set Equation Preferences command, the Current document option will be enabled. If you've copied an equation to the clipboard before running this command, Equation on clipboard will be enabled. You can also use the preferences MathType is currently using for new equations, or you can pick an existing MathType 7 equation preferences file. You can see the details of the selected preferences by clicking the Preview… button, which opens the Preview Preferences dialog.
Set as default?
Check the Use for new equations checkbox to use the selected preferences for new equations inserted into this document. This is equivalent to using the Set Equation Preferences command as well. (If you've chosen the Current document option, this is redundant but it won't hurt anything if you check it.)
Begin
Click OK and the formatting process will start. Word's status bar displays a count of the number of equations processed, and when the process has completed a dialog will display a summary.
Converting equations
The Convert Equations command enables you to convert equations in a Word document into a variety of formats. You can choose to convert MathType 7 and Equation Editor equations, Word EQ formulas, Word 2007 (OMML) equation images, and MathType 7 translated text equations into MathType 7 equations or text equations.
OMML (Office Math Markup Language) equation images are created when a document is created in Word 2007 and later, the document includes equations created with the OMML equation editor, and the document is subsequently saved in Compatibility Mode (i.e., as a doc file).
MathType 7 text equations are equations translated into a text representation using the steps outlined in Working with TeX or Working with MathML. These equations can be converted back into MathType 7 equations, or translated into yet another text equation, provided that both the translator name and the MathType 7 data are preserved within the equation. If just the MathType 7 data is preserved, the text can be pasted into a MathType window.
You should always use this command when opening a document that has been authored or modified on another platform (such as would be the case if you're working on Windows but the document was created on a Mac). Although Word does a good job of converting graphics, equations many not display correctly, and font differences between the platforms inevitably cause display problems as well. Running this command converts and reformats the equations, solving these problems.
To convert equations in a Word document, follow these steps:
Work with a copy
Save a copy of your Word document just in case you don't like the results; a conversion of many equations is not easy to undo.
Which equations to convert?
Select the equations you wish to convert, or make no selection to scan the entire document.
Open the dialog
Use the Convert Equations command to open the Convert Equations dialog.
Converting from what to what?
Select the equation types to convert from, and to convert to. If necessary, select the desired translator. If using a translator, turn on the Include translator name as comment and Include MathType 7 data as comment options if you might want to convert these equations again.
Prompt?
Select the Prompt before converting each equation option if you want to choose which equations to convert and which to skip.
Begin
Click OK and the conversion process will begin. Feedback about the progress of the command is displayed in Word's status bar. When the command has finished a dialog displays the number of equations converted.
Converting a document from Word to LaTeX or MathML
LaTeX: If you're working with LaTeX in another document, the process described here won't create a complete LaTeX document. You'll still have to insert the appropriate preamble and other instructions and commands wherever appropriate. Still, this process provides a shortcut to creating a completely new document and copying & pasting the equations from Word.
Rich text + MathML: Like mentioned for LaTeX, this won't produce a complete stand-alone document, but if you're working in a web application (LMS, CMS, blogging platform, etc.) that incorporates a rich text editor (CKEditor, TinyMCE, etc.), the steps shown here will provide a way to "get from here to there" easily.
Start with a Word document
Create the document, or open one if it exists already.
Convert equations to MathType equations
On Word's MathType tab, choose the Convert Equations command. Set it to convert MathType equations, entire document, to your chosen format (see next subsection for description of the formats):

If you have Microsoft Word EQ field equations¹, MathType translator text equations², or Word 2007 and later (OMML) equations, enable those options. If not, leave them disabled and the conversion will be faster.
¹If you're not familiar with Microsoft Word EQ field equations, don't worry. You almost certainly don't have any in the document if you're not familiar with them.
MathType translator text equations are exactly the type of equations we're describing converting the equations to in your document. You'd only need to enable this option if you have such equations and they have the translator name and MathType data" (i.e., MTEF) with it. In other words, this string
\[\frac{{\sqrt 2 }}{2}\]will not convert, but this string will convert:
%%% MathType!Translator!2!1!LaTeX.tdl!LaTeX 2.09 and later! % MathType!MTEF!2!1!+- % feaahqart1ev3aaatCvAUfeBSjuyZL2yd9gzLbvyNv2CaerbdfgBPj % MCPbqedmvETj2BSbqefm0B1jxALjhiov2DaebbnrfifHhDYfgasaac % H8rrps0lbbf9q8WrFfeuY-Hhbbf9v8qqaqFr0xc9pk0xbba9q8WqFf % ea0-yr0RYxir-Jbba9q8aq0-yq-He9q8qqQ8frFve9Fve9Ff0dmeaa % baqaciGacaGaaeqabaWaaeaaeaaakeaadaWcaaqaamaakaaabaGaaG % OmaaWcbeaaaOqaaiaaikdaaaaaaa!34DD! \[\frac\sqrt 2{2}\]% MathType!End!2!1!%%Try it now if you want. Copy the long string immediately above and paste it into MathType You should see 22
Formats
Our recommendation is to use the MathJax:LaTeX format to convert to LaTeX or the MathML 2.0 (namespace attr) format to convert to MathML. The MathJax:LaTeX translator will use standard LaTeX (not AMS LaTeX) to format the equations, and \(…\) and \[…\] to enclose the equations. The MathML 2.0 (namespace attr) translator will use MathML 2.0 rules to format the equations, and will include the MathML namespace as an attribute to the <math> element.
If you need a different format, you have these other choices:
- AMSLaTeX
- AMSTeX
- LaTeX 2.09 and later
- MathML 2.0 (m namespace)
- MathML 2.0 (no namespace)
- MathML 3.0 (m namespace)
- MathML 3.0 (namespace attr)
- MathML 3.0 (no namespace)
Please note the MathML 3.0 translators do not support the full MathML 3 instruction set.
Conversion and status report
Click Convert if you haven't already. It will take a few seconds for MathType to start the process. After it initializes, you'll see a progress indicator in Word's status bar (the lower left of the Word window):
.png)
After MathType finishes converting all the equations, you'll see a status report:

What now?
Select everything in your Word document, copy it, and paste it into the Source or HTML view (or similar) in your rich text editor or into your document if you're converting to TeX.
As an example, we're working in CKEditor and have a Word document we want to copy over. We started with this Word document:

After converting the equations to MathML, we have:

We copy everything in the Word document and paste it into the Source view of our CKEditor:

When we switch back to normal view, after allowing a few seconds for the editor's MathType integration to process all the equations, we see our document:

Some final notes:
- As noted above, if you're converting to (La)TeX, there will be some additional processing you'll have to do to the document before it's fully a TeX document. If you're converting to MathML, there may be some additional processing to do. In our example, you can see the paragraph breaks are gone, so we'll have to manually press Enter to insert the linefeeds where required.
- Depending on your rich text editor, there may be some additional configuration steps in the editor's settings or in the MathType integration settings.
- After all of this is complete, if you're working in a rich text editor, the equations should be editable in MathType Click once to select the equation you want to edit, then click the MathType icon on the toolbar. The equation will open in MathType ready to edit:

Exporting equations
The Export Equations command allows you to export MathType 7 and Equation Editor equations in your Word document to individual graphics files. This can be useful when importing a Word document into a desktop publishing application.
One file will be created for each equation in the document. You can choose the format of the files: EPS, Windows Metafile (WMF) or GIF . The files are numbered sequentially, starting with any number you choose, and you can define the underlying pattern, e.g., Physics001.eps, Physics002.eps, etc. You can also choose to replace each exported equation in the document with the name of its corresponding file, e.g., <<Physics001.eps>>.
To export equations from a Word document, follow these steps:
Work with a copy
Save a copy of your Word document (this is always a good idea).
Which equations to export?
Select the equations you wish to export, or make no selection to export all equations in the document.
Open the dialog
Use the Export Equations command to open the Export Equations dialog.
Export where?
Enter the name of the folder in which you want to create the exported equation files. You can either type in the name of a folder (it doesn't have to exist), or click Browse… and select an existing folder.
Delete existing files?
Check the Delete all files of same type in folder option if you want to delete all existing files in the folder with the same extension. This can be very useful, but be careful you've chosen the correct folder!
Export format
Choose the export format from the list. The format determines the file extension that will be used.
Filename pattern
Select a pattern for the filenames, and the starting number. The pattern must contain at least one '#' character. The # characters are replaced by a sequential number to make every filename unique. Use multiple # characters if you want the numbers to have leading zeros (this will make them display in a more natural order in sorted lists). For example, with the pattern Eqn### and a starting value of 5, the first EPS file exported will be Eqn005.eps, then Eqn006.eps and so on. The # characters don't limit the maximum number, so the above pattern can generate filenames such as Eqn1000.eps if there are this many equations in the document.
Replace equations with file names?
Check the Replace equation with file name option if you want the equations in the document replaced with the name of the corresponding file, e.g., <<Eqn001.eps>>.
What range?
Choose the Whole document or Current selection option based on how much of the document you want to export from, and what you did in Step 2.
Click OK to start the exporting process. Word's status bar will show the progress, and once the process has completed a summary is displayed.
Creating web pages with MathPage (Windows only)
MathType 7 MathPage technology enables you to convert a Word document containing equations, equation numbers and equation references into a web page. The page will look virtually the same in your browser as it does in Word. Inline equations will be correctly aligned, display equations will be properly centered, and all equations will display and print as well as from Word itself. This is true for all of the major browsers, running on Windows, Mac and Linux/Unix platforms.
Tips for better web pages
- Use the MathType 7 Commands for Word to insert equations This is especially true for display equations that you want centered in a paragraph. MathPage does a good job of handling the various ways that you can center an equation and generating the correct HTML, but it works most reliably if you use MathType 7 Insert Display Equation and Insert Numbered Display Equation commands in Word.
- Use Word's Insert Symbol command for mathematical symbols This is far more efficient than creating a MathType 7 equation containing only a few symbols, both for Word and the browser. On the other hand, you must insert an equation if you want a MathZoom version of the symbol to pop up in the browser when the symbol is clicked. This is especially useful when using small, hard-to-read characters such as superscripts, subscripts, primes etc.
- Don't convert long documents; break them into smaller pieces While a large document may be desirable in Word for editing and printing, it does not translate well into a Web document. Large documents take longer to download, and are more cumbersome for viewing. When you print a long document in Word you get headers and footers inserted on every page. Printing from a browser is different; there are no headers and footers contained in the page itself, and page breaks can occur in the strangest places, sometimes breaking graphics such as equations in half. These problems can be minimized by breaking long documents into smaller sections, and making each one an individual web page.
- Don't use positioned or floating elements containing equations MathPage currently ignores these items, and although they do get converted into HTML any symbols and equations in these elements will not be handled properly. You can use simple left or right alignment on graphics and other elements to achieve proper display in the browser.
To publish a Word document to a web page using MathPage…
Save your Word document.
Click the command
Choose the Publish to MathPage command from Word's MathType 7 toolbar, menu or Ribbon tab.
Title of the page
Edit the Title as necessary. It will appear in the browser's title bar or tab.
File name
Choose the File Name for the web page. The default is to save it in the same folder as the Word document, but with an extension that depends on the choice you make in the Equations group (see #6 below). You can either type in the name of the file or click Browse… and choose it in the Save dialog.
View after publishing?
If you'd like to view the page once it's been generated, check the Display in default browser checkbox.
MathML or GIF?
Now you must decide how you want the document's equations displayed in the browser. MathML is a great option, but there are some considerations (see note below). If you wish to use MathML, select MathML using and choose a MathML target from the list. A brief description is displayed in the dialog for the selected target; for a more detailed description of the MathML targets, see the next topic. If you're not using MathML, you should choose Use images (GIFs). If you choose images, you can also turn on MathZoom, which allows equations in the web page to be magnified by clicking on them. If you're using MathML and the person reading your web page is using Internet Explorer with MathPlayer, MathZoom is turned on automatically.
Target browser
If you're using GIFs, choose the target browser; if you're using MathML, MathType 7 will make the appropriate browser choice automatically. Select the Internet Explorer 6 or newer (Windows) option if you know your web page will only be viewed by people using such a browser. The page will be smaller, particularly if it contains many mathematical symbols. Otherwise, choose the All browsers option.
Default for future pages?
The settings for this web page will be saved in the Word document, and displayed in the dialog if you run this command again. You can also use these settings (other than Title and File Name) as the default values for other web pages by checking the Use settings as defaults checkbox.
Begin
Click OK to generate the web page. You'll see a progress dialog appear, and when the page has been generated it will open up in your default browser (if you selected this option).
Supporting files
You may notice MathType 7 has also generated a supporting files folder, with a similar name to what you named the file. For example, if your MathPage file name is deriving_limits.htm, MathType 7 will create a folder named deriving_limits_files, and will save it to the same location as your MathPage.
- If you're using GIFs, you'll always need to upload both the folder and the MathPage, because the folder is where [MTP] saves the images for each of the equations in the MathPage. There is also a file named **mathpage.js**. You'll need to upload this file with your MathPage as well. If there are several MathPages on your website, you only need to upload mathpage.js once in every folder that contains a MathPage that uses GIFs.
- If you're using MathML, often you can get by with simply uploading the file itself, and not worrying about the supporting files folder. The safe thing to do though, is to upload both the file and the folder.
- If your MathML target choice was //Multi-browser (UMSS)//, there will be 2 additional files saved at the same level (i.e., in the same folder) as your MathPage. These files are named **pmathml.xsl** and **pmathmlcss.xsl**. You must upload these files with your MathPage, and keep them at the same level as your MathPage. If there are several MathPages on your website, you only need to upload these 2 xsl files once in every folder that contains a MathPage.
You should examine the web page and if you find any problems, modify the original Word document and run this command again. It's generally best not to edit the MathPage itself.
Publishing to MathPage using MathML
Caution: Although browser support for MathML has greatly improved, there are some different approaches to producing a web page containing MathML. MathPage supports several targets, described below, that differ in the number and type of browsers that can display the page. We recommend the XHTML+MathJax target or XHTML+MathML in most cases. If you're using a Mac, please note that not all of these targets are available on the Mac yet.
HTML5+MathML
For the "purest" MathML output, this is the best choice since it uses HTML5, and MathML is part of the HTML5 spec. It doesn't rely on any external tools to render the MathML equations, but it does require a MathML-capable browser or other software, such as accessible technology (screen readers, etc.).
HTML+MathJax
If you're targeting an audience with the latest and greatest browsers, the XHTML target (next bullet) is probably a better choice. If you're not sure, then this one should work in most all situations. Valid file extensions are .htm and .html; default is .htm.
XHTML+MathJax
All other things being equal, this is the preferred target to use. If your browser (and that of your audience) supports HTML5 or XHTML, and/or if your workflow involves ebooks, this is the clear choice. This should work in most browsers on mobile devices also. Valid file extensions are .xht, .xhtml, and .xml. Default is .xht.
XHTML+MathML
This target generates the preferred cross-platform MathML format, an XHTML page containing MathML. For the pages to display properly in Internet Explorer for Windows, your audience will need MathPlayer 2.0 or newer installed. For more details please visit the MathPlayer website. This format will work with most of the latest-release browsers, but if you find it doesn't work for some of your audience, you should try one of the MathJax targets above. Valid file extensions are .xht, .xhtml, and .xml. Default is .xht.
MathPlayer (IE behavior)
MathPlayer is our MathML display engine for Internet Explorer 6 or newer on Windows only. Choose this target if your audience will be using only this browser, or will be using assistive technology to have the MathPage read aloud. In most cases, for more flexibility we recommend the XHTML+MathJax target. For more details please visit the MathPlayer website. Valid file extensions are .htm, .html, .shtm, .shtml, and .stm. Default is .htm.
Multi-browser (UMSS)
The inclusion of the 2 MathJax targets described above has all but eliminated the need to use the Multi-browser (UMSS) MathPage target. If you choose one of the MathJax targets and find a good number of your audience is using an older browser that may not display the MathJax equations properly, or if they have JavaScript disabled, this general-use target should work. The Universal MathML Stylesheet (UMSS) is an XSLT stylesheet that permits a single web page containing MathML to be displayed in a variety of different browsers. It detects the current browser in use, and whether it has built-in support for MathML or whether a plug-in such as MathPlayer or techexplorer is available. It then makes the necessary adjustments to the content. It even uses CSS to format equations if no MathML renderer is available. This universality comes at the expense of a slight delay in displaying the document, and the need to distribute a couple of extra files with the web page (pmathml.xsl and pmathmlcss.xsl). For more details please see http://www.w3.org/math/xsl. Valid file extensions are .xht, .xhtml, and .xml. Default is .xht.
Typing TeX directly into Word (Toggle TeX)
The Toggle MathType 7 command allows you to type Texvc directly into a Word document and convert it into a MathType 7 equation. Since it's a "toggle", choosing the command again will return the MathType 7 equation to Texvc.
- To enter an Inline Equation, the Texvc must be delimited as
$…$. - To enter a Display Equation, the Texvc must be delimited as
\[…\]. - To convert a single equation, first select it (by clicking it once with the mouse) OR place the cursor near it in the same line. Then either:
- Click the Toggle TeX icon in the Publish group of the MathType 7 tab on Word's ribbon.
- Type
Alt+\/Option+\.
- To convert all equations in a region of a document, select the region, and follow one of the two steps above. Note the Toggle TeX command will convert all equations found in the highlighted region regardless of whether they are Texvc or MathType 7 equations, so if you select a mix of both MathType 7 and Texvc equations and toggle, the result will again be a mix.
Reference: MathType dialogs in Word
The dialogs described below provide access to the different MathType 7 commands and features for inserting, modifying, and maintaining your MathType 7 equations in Word. They are presented below in the order in which they appear in the MathType 7 tab.
Dialogs in the Equation Numbers group
.gif)
Insert Equation Number dialog

This dialog appears the first time you insert an equation number into a document, if you have not already inserted a chapter/section break. An equation chapter/section break lets you define the chapter and/or section number part of an equation number, for example the 2 in the equation number (2.3).
If you click OK, an equation section break will be inserted at the start of the document, using the numbers you specify, and then an equation number will be inserted at the current location of the insertion point. If you prefer, you can click Cancel and then insert an equation section break at the location you desire. In this case you will have to choose the Insert Equation Number command again.
This dialog will not appear once you have inserted an equation section break, or if you have selected an equation number format that does not include a chapter or section number. Check the Always start new documents with chapter 1, section 1 option if you do not wish to see this dialog the first time you insert an equation number into a document. You can also control whether this dialog appears by checking or clearing the Warn when inserting first equation number checkbox in the Format Equation Numbers dialog.
Format Equation Numbers dialog

This dialog lets you set the format for new equation numbers or change the format of existing equation numbers.
Number Format
This section lets you specify a number format. The Simple Format option lets you pick the enclosure, separator and format of each part of the number. All parts are optional; use the checkbox next to each part to include/exclude it from the number. The Preview shows you an example using your format.
If you want more control over the format you can choose the Advanced Format option, and then enter the desired format in the Format edit box. All characters in the format are used literally, except for the terms #C, #S and #E. These correspond to the Chapter, Section and Equation parts of the number (and can be in any order). Each of these terms must be followed by another character indicating the numeric format; these correspond to the choices in the menus and are as follows:
| 1 | Numeric | 1, 2, 3, … |
| A | Alphabetic | A, B, C, … |
| a | alphabetic | a, b, c, … |
| I | Roman | I, II, III, … |
| i | roman | i, ii, iii, … |
Thus the format (#C1:#S1-#Ei) would generate the number (1:1-i). The Preview updates as you make changes to the format. A useful tip is to use the Simple Format option to get the format as close as possible to the desired format, then choose the Advanced Format option and make the final changes.
Change the equation number format for
Options in this section control which equation numbers are affected by the settings in this dialog. Choose New equation numbers to affect new equation numbers created with the Insert Equation Number command. Choose Current selection or Whole document to update existing equation numbers.
Options
-
Update equation numbers automatically
Whenever you insert an equation number or an equation reference into a document, all of the existing equation numbers and references are updated so that the numbering sequences are correct. Typically this operation doesn't take very long, but if you are running on a slower computer, or you are working on a large document, then this process may start taking a while. If so, you can turn off this option, which prevents the update from automatically taking place.Caution
If you turn off automatic updating, you must manually update the numbers using the Update Equation Numbers command. You must also use this command if you move or delete an equation number, as the automatic updating doesn't occur in these situations. Note: Depending on the options you've set in Word, the equation numbers may automatically update when you print the document. If you have a lot of equation numbers and it's taking a long time before printing starts, this may be why. Look for a setting titled "Update fields before printing" in Word Options. -
Warn when inserting first equation number
The first time an equation number is inserted into a document, the document is checked to make sure it contains an initial chapter/section break. If it doesn't, the default behavior is to present a dialog asking for the starting chapter and section numbers. If you uncheck this option, starting values of 1 will be inserted without the dialog appearing. -
Warn when inserting equation references
When an equation reference is inserted into a document, the default behavior is to present a dialog that reminds you to double-click an equation number to actually insert the reference. If you uncheck this option, this dialog will no longer appear. -
Use format as default for new documents
Check this option if you want to use the current format as the default for all new documents. The first time you insert an equation number into a new document, the format is saved with the document. This means that the default format only affects documents that haven't had equation numbers inserted.
Insert Equation Reference dialog

This dialog appears when you insert an equation reference using the Insert Equation Reference command on the MathType 7 Menu, MathType 7 Toolbar, or the MathType 7 Tab in Word 2007 and later.
To insert an equation reference at the current location of the insertion point, click OK and then double-click the equation number that you wish to reference. You can scroll the document to bring the desired equation number into view if necessary. After double-clicking an equation number, the document will scroll back to the location where the equation reference was inserted.
If you are inserting references that aren't very close to the original equations, you can avoid a lot of scrolling backwards and forwards by splitting the Word window into two panes. Then you can insert the references in one pane, and double-click the equation numbers in the other.
Check the Don't show me this again option if you do not wish to see this dialog every time you insert an equation reference. You can also control whether this dialog appears by checking or clearing the Alert when inserting equation references checkbox in the Format Equation Numbers dialog.
Insert Chapter/Section Break dialog

This dialog allows you to insert a chapter/section break, which defines the chapter and/or section numbers for this portion of the document. These numbers will be displayed in all equation numbers up to the next chapter/section break. The equation number format in use determines the actual display, e.g., whether the Chapter number is displayed.
The break simply resets the chapter and/or section number. If your document doesn't contain multiple chapters then ignore the chapter portion of the dialog. If your document contains multiple chapters and/or multiple sections, you'll normally want to increment the numbers, as described below. And when you start a new chapter, you'll usually want to reset the section number back to 1.
Chapter
Choose the New Chapter option to define the chapter number. Once selected, you can choose the Next chapter number option to increment the chapter number by 1, or choose the Chapter number option and enter the desired number. If you aren't using chapters and chapter numbers, you can ignore this option and leave it turned off.
Section
These options work similarly to the chapter options. Choose the Next section number option to increment the section number by 1, or choose the Section number option and enter the desired number (or letter) in the box provided.
Modify Chapter/Section Break dialog

This dialog allows you to change the chapter and/or section number for the portion of the document containing the insertion point. As an aid, the chapter/section break that indicates the beginning of the section will be selected and, if necessary, the document will be scrolled to bring the break into view.
This dialog is identical to the Insert Chapter/Section Break dialog, with the addition of a Delete button. The dialog's options reflect the break's chapter and section number values.
Chapter
Choose the New Chapter option to define the chapter number. Once selected, you can choose the Next chapter number option to increment the chapter number by 1, or choose the Chapter number option and enter the desired number. If you aren't using chapters and chapter numbers, you can ignore this option and leave it unchecked.
Section
These options work similarly to the chapter options. Choose the Next section number option to increment the section number by 1, or choose the Section number option and enter the desired number (or letter) in the box provided.
Delete
Click this button to remove the selected chapter/section break, effectively merging the current chapter/section with the previous one (if one exists).
Dialogs in the Format group
.gif)
Set Equation Preferences dialog

Use this dialog to set and/or view the equation preferences (styles, sizes, and spacing settings) used for new equations you insert into the current document. The preferences are used only for equations inserted using the commands on the MathType tab in Word's ribbon.
MathType's 'New Equation' preferences
Choose this option to use MathType 7 new equation preferences each time you insert a new equation, instead of the equation preferences (if any) of the current document.
This document's equation preferences
Choose this option to use equation preferences in the current document when you insert a new equation. If you have not yet set these preferences, the Load Preferences dialog will be displayed (see Load from MathType 7 Preference File… below), allowing you to set them.
Load from MathType 7 Preference File…
Click this button to set the equation preferences using a MathType 7 preference file previously created using MathType 7 Save Equation Preferences dialog.
Preview…
Click this button to view the preferences that will be used for new equations. See the Preview Preferences dialog.
Preview Preferences dialog

This dialog displays a list of equation preferences. The preferences are displayed as a list of items and values, as set using MathType Define Styles, Define Sizes, and Define Spacing dialogs.
Format Equations dialog

This dialog allows you to change the formatting of all MathType 7 Equation Editor, and Word EQ field equations in the chosen range. It applies the equation preferences (styles, sizes, spacing) you choose to all equations in the current selection or the entire document.
Note that Equation Editor equations and Word EQ fields will be converted to MathType 7 equation objects by this operation. If you do not want this to happen, you must choose a range that omits them.
Format equations using preferences from:
Use this section to select how you want the equations to look by selecting equation preferences that will be used in the formatting operation.
- Current document Choose this option if you want to use the current document's equation preferences. This option will only be available if you have set the equation preferences for the document. See the Set Equation Preferences dialog.
- MathType 7 'New Equation' preferences Choose this option if you want to use the preferences MathType is currently configured to use for new equations.
- Equation on clipboard Choose this option to reformat the equations to have the same format as an existing equation. In preparation for using this option, copy the equation on which you want to base the formatting to the clipboard . The equation may be in the current document, any other document, or in a MathType equation window. This option will only be available if there is an equation on the clipboard.
- MathType 7 preference file Choose this option to format the equations based on the equation preferences you have previously saved in a file using the Save to File… command on MathType Equation Preferences menu. Use the Browse button to locate the file.
- Use for new equations Check this box to use the selected equation preferences for new equations you create in this document.
- Preview Click this button to view the style, size and spacing definitions you've selected. See the Preview Preferences dialog.
Range
These options allow you to choose the range within the document in which equations will be formatted: Whole document will format all equations in the document, while Current selection will only format those equations in the current selection.
Convert Equations dialog

The Convert Equations dialog is used to convert equations in your document between various equation types. This is useful, for example, when you want to convert some or all of the Equation Editor equations in a Word document into MathType 7 equations, or to convert graphic equations into a text-based language, such as TeX or MathML, for which there is a MathType 7 translator available.
Equation types to convert:
Only the equation types checked in this group will be converted. The equation types that can be converted are:
- MathType 7 or Equation Editor equations. This includes equations created by any version of MathType 7 or Equation Editor. They can be OLE objects, GIF images, or MathType 7 1.x macros.
- Microsoft Word EQ fields. These are equation fields inserted using Word's Insert Field command. Prior to the introduction of Equation Editor with Word for Windows 2.0, this was the only way to insert mathematical equations into Word documents.
- MathType 7 translator text equations. This is any equation created using a MathType 7 translator (which creates text-based equation formats such as TeX or MathML). In order for this option to work the equations must contain both MathType 7 and translator information. This information is included by MathType when you turn on the Include translator name in translation and Include MathType 7 data in translation options in MathType Cut and Copy Preferences dialog, and when you turn on the equivalent options in the Convert equations to group in this dialog.
- Word 2007 (OMML) equations. Word 2007 introduced a new equation editor that utilizes the Office Math Markup Language (OMML). This dialog option converts OMML equations into MathType 7 equations or into text, as selected in the Convert equations to group in this dialog. This feature is not available in all versions of Word.
You must select at least one equation type, or no equations will be converted.
Range
These options allow you to choose the range within the document in which equations will be converted: Whole document will convert all equations in the document, while Current selection will only convert those equations in the current selection.
Prompt before converting each equation
Check this option to be prompted before each equation is converted. This gives you an opportunity to skip equations you do not want to convert.
Convert equations to
Options in this section allow you to specify the type of equation to which to convert.
- MathType 7 equations (OLE objects). This will result in normal MathType 7 graphic equation objects.
- Text using MathType 7 translator. This will result in each equation being converted to plain text using the currently selected translator.
The other options in this section allow you to choose the translator and to determine whether MathType 7 internal data gets included in the translation. If you convert equations to text using one of the translators, and think you might want to convert them to another format in the future, turn on the Include translator name as a comment and Include MathType 7 data as a comment options. See the Cut and Copy Preferences Dialog for more details.
Convert
Click this button to convert all equations that match the given criteria.
Dialogs in the Publish group

Export Equations dialog

This dialog allows you to export the MathType 7 (and Equation Editor) equations in your Word document to individual graphics files. This can be useful when importing a Word document into a desktop publishing application.
Export To
You can type in the name and location of the folder into which you want to export the equation files, or you can choose an existing location using the Browse… button.
If you're continually exporting files to the same folder, it can be useful to have it cleaned out before the export begins. The Delete all files of same type in folder option is provided for this purpose. However, be careful that you've chosen the correct folder or you may delete files you didn't mean to delete!
File Format
This section lets you choose a File type, a File name pattern, and the First number with which to begin numbering files. The number gets incremented for each exported equation, and inserted into the file name in place of the # characters in the pattern. For example, with the pattern Eqn### and a starting value of 5, the first EPS file exported will be Eqn005.eps, then Eqn006.eps and so on. Using multiple # characters helps in making all file names the same minimum length, which causes them to display in the correct sequence when sorted. Select Replace equation with file name to replace each equation with its filename enclosed in double angle brackets, e.g., <<Eqn005.eps>>.
Range
These options allow you to choose the range within the document from which equations will be exported: Whole document will export all equations in the document, while Current selection will only export those equations in the current selection.
Publish to MathPage dialog

This dialog allows you to convert a Word document to a web page in which the equations display and print properly. Publishing to MathPage using MathML contains additional information about this feature. We strongly recommend that you read it first. It explains the process more fully, and contains many tips for creating great web pages.
Document
This section lets you set the Title of the web page and its File Name. Display in default browser will open the generated page in your default Web browser after the generation process has completed.
Equations
In this section you can choose how equations will be represented in the web page: either as GIF images or using MathML.
-
Use images (GIFs)
If you choose Use images (GIFs), a set of GIF files is created for every equation (and some symbols). When the page is viewed in a browser, dynamic HTML is used to select the appropriate image depending on the resolution of the monitor. This makes the size of the equation more closely match the size of the surrounding text. A high-resolution image is used when the page is printed, again making the equation match the rest of the document. You can also choose to use our MathZoom technology, which zooms (magnifies) equations when you click on them, allowing you to see clearly subscripts, superscripts, hats and primes. -
MathML using
Equations can also be represented as MathML. MathML is a World Wide Web Consortium (W3C) specified language for expressing mathematics (for more details visit their website at http://www.w3.org/math). There are several different ways it can be used, depending upon the browser and/or plug-in that you and your audience are using. When you select MathML using, the dialog contains a list of MathML "targets" from which you can choose. A page generated for a given MathML target may not display properly when viewed in another browser or without the required plug-in being installed.Caution
These are the 5 MathML targets. If you're using a Mac, please note that not all of these targets are available on the Mac yet. You can read full descriptions of each target in Publishing to MathPage using MathML, but here are some brief suggestions about when and why to choose one over another. - HTML5+MathML. For the "purest" MathML output, this is the best choice since it uses HTML5, and MathML is part of the HTML5 spec. It doesn't rely on any external tools to render the MathML equations, but it does require a MathML-capable browser or other software, such as accessible technology (screen readers, etc.).
- HTML+MathJax. If you're targeting an audience with the latest and greatest browsers, the XHTML target (next bullet) is probably a better choice. If you're not sure, then this one should work in most all situations.
- XHTML+MathJax. All other things being equal, this is the preferred target to use. If your browser (and that of your audience) supports HTML5 or XHTML, and/or if your workflow involves ebooks, this is the clear choice. This should work in most browsers on mobile devices also.
- XHTML+MathML. This target has the same advantages as the previous target, but will work in browsers that either don't support JavaScript, or browsers in which the user has disabled JavaScript.
- MathPlayer (IE behavior). If you know your audience is using Internet Explorer and/or will be using assistive technology to read the web page, this is the best target.
- Multi-browser (UMSS). If you find none of the other targets work for you, this target would have the widest possible coverage of browsers and operating systems. It does require uploading 2 supporting files in addition to the MathPage itself.
Target Browser
In this section, you can choose the target browser if you're using GIFs. If you're using MathML, there is no option to change it. For MathML, the selection defaults to All browsers unless you choose the "IE Behavior" option. Some browsers can display many symbols correctly as characters in the document, while other browsers require GIF images to be used for some symbols. If you're sure the audience for your pages will only be using Internet Explorer 6 and newer for Windows, select this choice as the page will download slightly faster. Otherwise choose the All browsers option. If you're using MathML, the proper button for Target Browser will be automatically selected, depending on the MathML target you chose.
Use settings as defaults
Select this item to use the selected settings the first time Export to MathPage is used on any documents in the future. If Export to MathPage has already been used on a document, its previous settings will display and not these defaults.
Dialogs in the MathType group
.gif)
MathType Options dialog

The MathType 7 Options dialog gives you control over how MathML is pasted into a Word document. Launch this dialog from the dialog box launcher (Windows) or the MathType 7 Options command (Mac) in the MathType 7 group of the MathType 7 tab in Word 2016 for Mac, or the MathType 7 menu in Word 2011 for Mac.
Source of MathML
The choices you make on this dialog are active regardless of the source of the MathML. You may have copied MathML from a website, created a handwritten equation in the Windows Math Input Panel (MIP), or you may have chosen a MathML translator in MathType and copied an equation. Each of these actions will place MathML on the clipboard, which is then handled in one of two ways, depending on your choice on the MathType 7 Options dialog
-
Create a MathType equation
When you paste MathML into Word or click the Insert button on the MIP, MathType creates a MathType 7 equation from the MathML and places it at the insertion point in Word. -
Create an OMML equation
When you choose this option, MathType will create an OMML equation at the insertion point in Word upon MathML paste or clicking Insert in the MIP. -
Prompt on each paste
After choosing this option, MathType will display the MathType Paste dialog each time you attempt to insert MathML into Word.
Reset all "Don't show me this again" options
This checkbox is used to reset three settings:
- Don't show me this again checkbox in the "Update Equation Numbers" dialog, when updating equation numbers is taking too long.
- Don't show me this again checkbox in the "Insert Equation Reference" dialog.
- Always start new documents with chapter 1, section 1 checkbox in the "Insert Equation Number" dialog. Although this is not labeled "Don't show me this again", it still gets reset when the "Reset" checkbox is checked in the MathType 7 Options dialog.
Dialog not available through the MathType tab on Word's ribbon
MathType Paste dialog

If the Windows clipboard contains MathML and you attempt to paste it into a Word 2007 or later document, this dialog will appear unless...
- you have chosen the Prompt on each paste on the MathType Options dialog, or
- you have previously made a choice on the MathType 7 Paste dialog and checked the Remember my choice checkbox.
Create a MathType equation
When you paste MathML into Word or click the Insert button on the MIP, MathType creates a MathType 7 equation from the MathML and places it at the insertion point in Word.
Create an OMML equation
When you choose this option, MathType will create an OMML equation at the insertion point in Word upon MathML paste or clicking Insert in the MIP.
Remember my choice
If you check this box, the MathType 7 Paste dialog will not appear in the future when you paste MathML. To reinstate the behavior of the dialog appearing for each MathML paste, click the dialog launcher in the MathType group on the Ribbon.
MathType's support for Microsoft PowerPoint
Tip: MathType is available also as a complement in PowerPoint, if you want to use it in an online context or iPad. See the MathType Add-in for PowerPoint section for further info.
Using MathType 7 in PowerPoint is similar to using it in Word, with the notable exception that it's not possible to insert inline equations in PowerPoint, because PowerPoint does not allow external objects to be inline with text.
To insert an equation, click the MathType 7 tab, then the MathType 7 button in the Insert Equation group. Make sure your font face and font size match the text you're using on the slide. Create the equation and close MathType 7 to insert the equation onto the slide. Move into position. The process is shown in this animation:

Inserting handwritten math (Windows 7 and later)
There is no direct support for the Windows Math Input Panel (MIP) in PowerPoint, but it is still possible to use the MIP and MathType together to insert handwritten math in PowerPoint by following these steps:
- In PowerPoint, choose the Insert Equation command from the MathType 7 tab on PowerPoint's ribbon.
- In MathType Edit menu, choose the Open Math Input Panel… command.
- After you write your equation in the MIP, click the Insert button, and the equation will be pasted into MathType
- Close the MathType window and the equation will be placed on your PowerPoint slide.
Insert Equation group
 |
 |
 |
| Windows | PowerPoint 2011 | Mac PowerPoint 2016 |
Insert Equation. Opens a new MathType window ready for you to enter an equation.
Note: PowerPoint does not allow inline "objects", such as MathType 7 equations. Thus, all equations entered into a PowerPoint slide will be "floating", and you will have to click and drag them into position.
Tip: To make the equations the correct size to match the text of your slide, don't click and drag a corner. If you do that, two things will happen, neither of which is good. First, no two equations will be exactly the same size. Second, it will take an unnecessarily large amount of time to do that, since you will have to size each equation this way. The right way to size equations for PowerPoint is to use MathType Define Sizes dialog. Set "Full" size to match the size of the text on your slide. If you're working in Word and PowerPoint at the same time, save a Preference File for Word and one for PowerPoint. This will provide an easy way to switch from Word's fonts & sizes to those for PowerPoint.
Browse group
 |
 |
 |
| Windows | PowerPoint 2011 | Mac PowerPoint 2016 |
Browse. The Browse group allows you to search back and forth through the slides for equations.
Help group
 |
 |
| Windows | Mac PowerPoint 2016 |
Note: If you're using PowerPoint 2011 for Mac, commands described below are in PowerPoint's MathType 7 menu.
MathType Help.
- Table of Contents… Opens this documentation.
- Using MathType 7 in PowerPoint… Opens this section of the documentation.
- Unlock/Register MathType 7 Gives you information on how to enter your product key to unlock MathType as well as register your product so you can receive free technical support, upgrade notices and special upgrade pricing.
-
About MathType 7 Displays MathType 7 About box showing you:
- The version of the MathType application you are currently using
- Copyright information
MathType on Web
- MathType 7 Home Page… Opens this documentation.
- Online Support… Opens the tech support area of the MathType 7 Web site, where we have many tips and tech support notices that will give you help solving problems and information on compatibility with other applications.
- Send Feedback by Email… Opens your email program so that you can send feedback to Wiris regarding your experiences with MathType 7 or to request future enhancements. If you have a problem using MathType 7 or a bug to report, please visit our online tech support area first.
- Order MathType 7 Opens the e-commerce area of the Wiris Web site where you can purchase MathType 7 (or any of our other products).
Future MathType 7 Opens a page on our website that will allow you to give us your ideas for future enhancements of MathType 7
MathType's support for Microsoft Excel
There isn't built-in support for MathType 7 in Microsoft Excel -- not in the sense of the support in Word and PowerPoint. You can insert a MathType 7 equation into an Excel sheet or chart either by going through Excel's Insert Object dialog, or by copying from MathType 7 and pasting into Excel. Doing so will not result in an Excel formula (i.e., it's essentially a static image). You can double-click to edit the equation, like you would in Word or PowerPoint, but it is an object floating on top of the cell. It is not part of the cell's contents (or chart's contents).
Note: Excel 2016 and later for Mac does not support inserting MathType equations from the Insert Object dialog. Further, if you copy and paste an equation into Excel for Mac, the result will be a picture. If you need to edit the equation later, you'll need to replace the equation with a new one. The process described in the next section does work in Excel for Mac.
Creating a MathType matrix from Excel data
The one thing you can do in Excel is copy a range of cells, and paste them into MathType 7 as a matrix. To do so, select the cells containing the data, then copy and paste into MathType 7 In general, the formatting will not carry over from Excel to MathType 7 but the "shape" of the copied region will. For example, if you're copying a block of data in Excel that's 8 rows by 2 columns, this will result in an 8×2 matrix in MathType
- A single row of data will result in a single line in MathType – not a row matrix.
- A single column of data will result in a properly-formatted column matrix in MathType
This may also work in spreadsheets other than Excel, and in word processors and text editors. It does not work in OpenOffice.
